openGauss
开源数据库
openGauss社区官网
开源社区
openGauss/MogDB-3.0.0 dcf测试(非om安装)
openGauss/MogDB-3.0.0 dcf 测试(非 om 安装)
本文出处:https://www.modb.pro/db/402037
IP 地址
***.***.***.*** LERDER
***.***.***.*** FOLLOWER
***.***.***.*** FOLLOWER
一、安装 openGauss
安装依赖包
yum install -y bzip2 bzip2-devel curl libaio
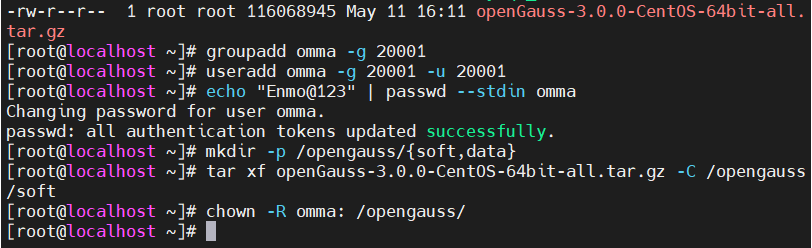
创建用户、组并创建目录
groupadd omma -g 20001
useradd omma -g 20001 -u 20001
echo "****@***" | passwd --stdin omma

mkdir -p /opengauss/{soft,data}
tar xf openGauss-3.0.0-CentOS-64bit-all.tar.gz -C /opengauss/soft
配置环境变量
echo "export GAUSSHOME=/opengauss/soft"  >> /home/omma/.bashrc && \
echo "export PATH=\$GAUSSHOME/bin:\$PATH " >> /home/omma/.bashrc && \
echo "export LD_LIBRARY_PATH=\$GAUSSHOME/lib:\$LD_LIBRARY_PATH" >> /home/omma/.bashrc

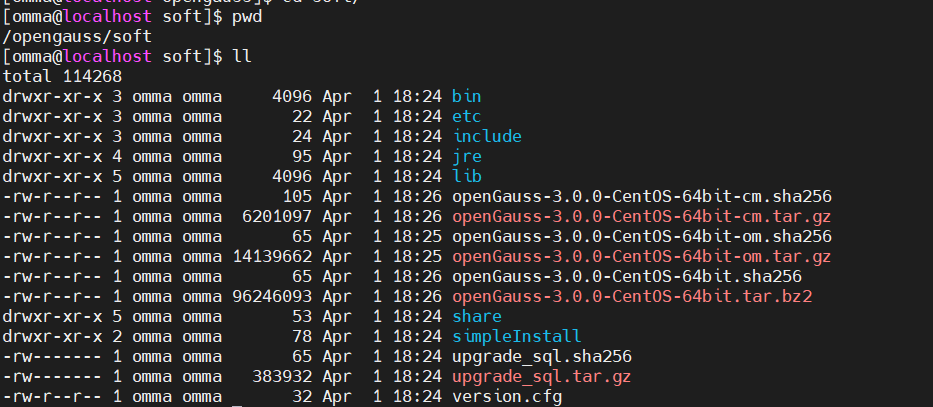
解压数据库软件包
cd /opengauss/soft
tar -xf openGauss-3.0.0-CentOS-64bit.tar.bz2
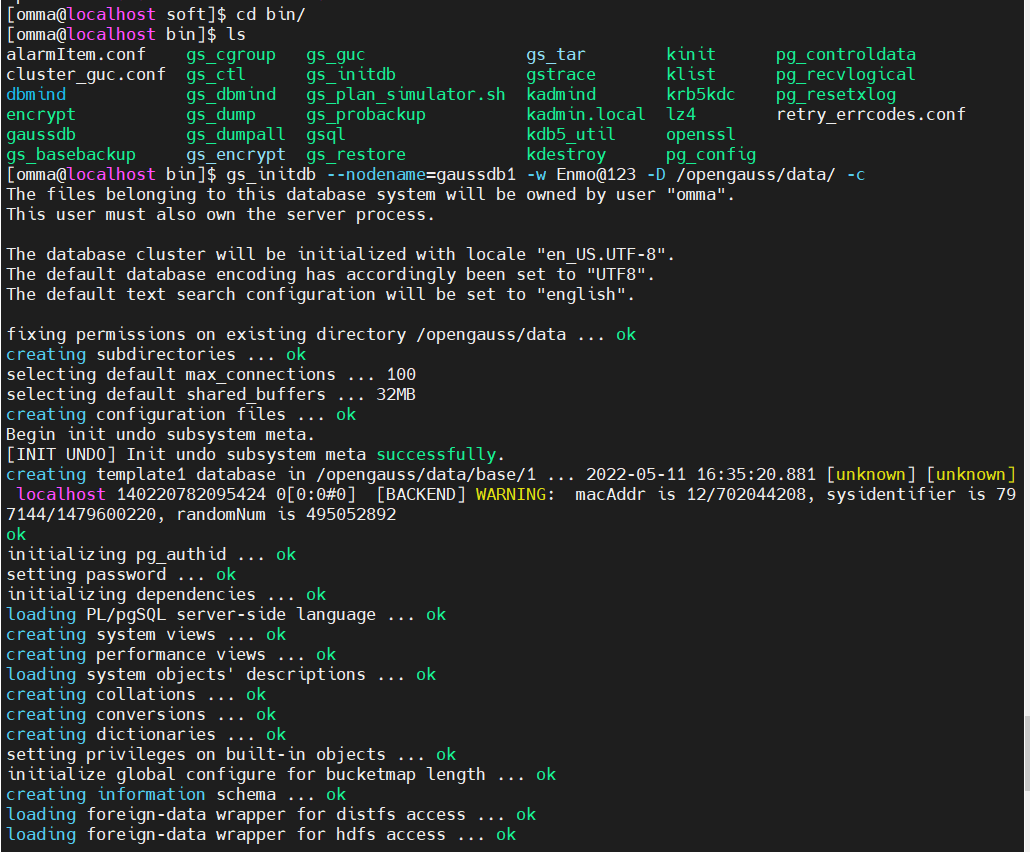
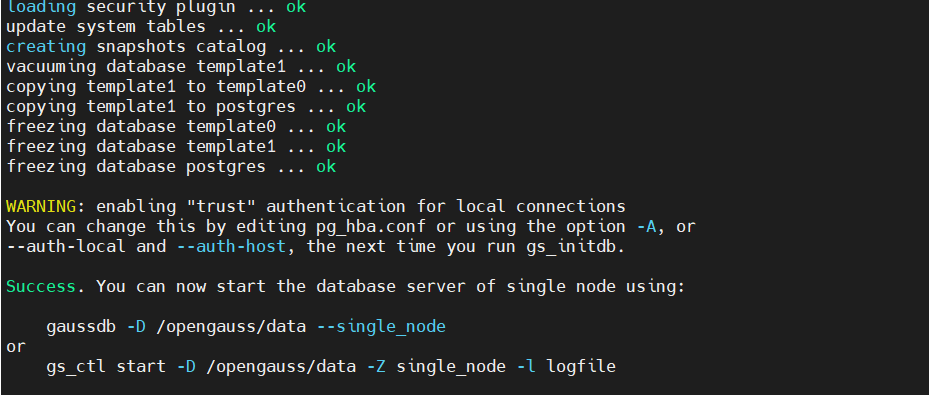
初始化数据库 后续所有操作均使用 omma 用户,初始化需要加-c 参数,会生成 dcf 相关文件(注意 nodename)
gs_initdb --nodename=gaussdb1 -w ****@*** -D /opengauss/data/ -c
二、配置 dcf 参数
1.配置白名单
在 pg_hba.conf 里添加白名单 
2.配置 dcf 参数与 replconninfo
因为在初始化时加了-c,会自动打开 enable_dcf 参数 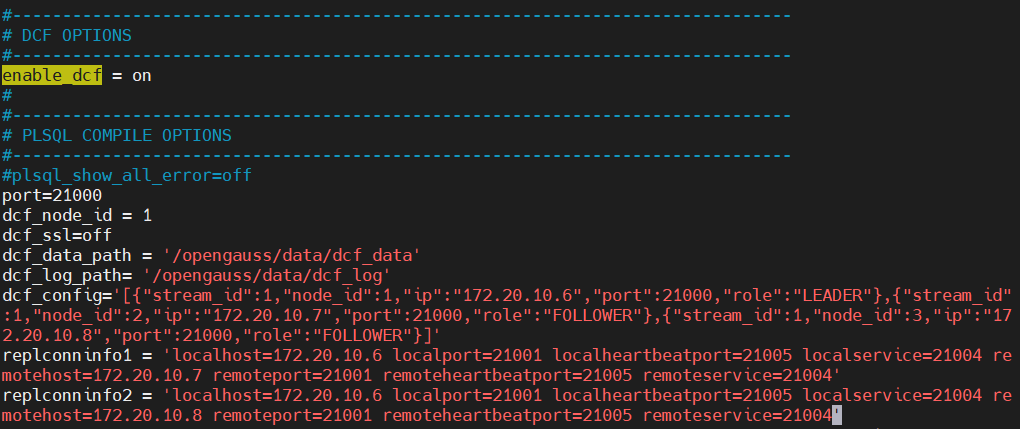 在节点一的 postgresql.conf 里添加
port=21000
dcf_node_id = 1
dcf_ssl=off
dcf_data_path = '/opengauss/data/dcf_data'
dcf_log_path= '/opengauss/data/dcf_log'
dcf_config='[{"stream_id":1,"node_id":1,"ip":"***.***.***.***","port":21000,"role":"LEADER"},{"stream_id":1,"node_id":2,"ip":"***.***.***.***","port":21000,"role":"FOLLOWER"},{"stream_id":1,"node_id":3,"ip":"***.***.***.***","port":21000,"role":"FOLLOWER"}]'
replconninfo1 = 'localhost=***.***.***.*** localport=21001 localheartbeatport=21005 localservice=21004 remotehost=***.***.***.*** remoteport=21001 remoteheartbeatport=21005 remoteservice=21004'
replconninfo2 = 'localhost=***.***.***.*** localport=21001 localheartbeatport=21005 localservice=21004 remotehost=***.***.***.*** remoteport=21001 remoteheartbeatport=21005 remoteservice=21004'
类似得,在其他两个备机添加 节点二:
port=21000
dcf_node_id = 2
dcf_ssl=off
dcf_data_path = '/opengauss/data/dcf_data'
dcf_log_path= '/opengauss/data/dcf_log'
dcf_config='[{"stream_id":1,"node_id":1,"ip":"***.***.***.***","port":21000,"role":"LEADER"},{"stream_id":1,"node_id":2,"ip":"***.***.***.***","port":21000,"role":"FOLLOWER"},{"stream_id":1,"node_id":3,"ip":"***.***.***.***","port":21000,"role":"FOLLOWER"}]'
replconninfo1 = 'localhost=***.***.***.*** localport=21001 localheartbeatport=21005 localservice=21004 remotehost=***.***.***.*** remoteport=21001 remoteheartbeatport=21005 remoteservice=21004'
replconninfo2 = 'localhost=***.***.***.*** localport=21001 localheartbeatport=21005 localservice=21004 remotehost=***.***.***.*** remoteport=21001 remoteheartbeatport=21005 remoteservice=21004'
节点三:
port=21000
dcf_node_id = 3
dcf_ssl=off
dcf_data_path = '/opengauss/data/dcf_data'
dcf_log_path= '/opengauss/data/dcf_log'
dcf_config='[{"stream_id":1,"node_id":1,"ip":"***.***.***.***","port":21000,"role":"LEADER"},{"stream_id":1,"node_id":2,"ip":"***.***.***.***","port":21000,"role":"FOLLOWER"},{"stream_id":1,"node_id":3,"ip":"***.***.***.***","port":21000,"role":"FOLLOWER"}]'
replconninfo1 = 'localhost=***.***.***.*** localport=21001 localheartbeatport=21005 localservice=21004 remotehost=***.***.***.*** remoteport=21001 remoteheartbeatport=21005 remoteservice=21004'
replconninfo2 = 'localhost=***.***.***.*** localport=21001 localheartbeatport=21005 localservice=21004 remotehost=***.***.***.*** remoteport=21001 remoteheartbeatport=21005 remoteservice=21004'
三、启动 openGauss
全部以备机身份拉起
gs_ctl start -D /opengauss/data -M standby
手动设置存活节点为少数派模式运行,在主节点执行(即 LEADER)
gs_ctl setrunmode -D /opengauss/data -v 1 -x minority
 集群其他节点主动重建拉起,在所有备节点执行(即 FOLLOWER) gs_ctl build -b full -D /opengauss/data
 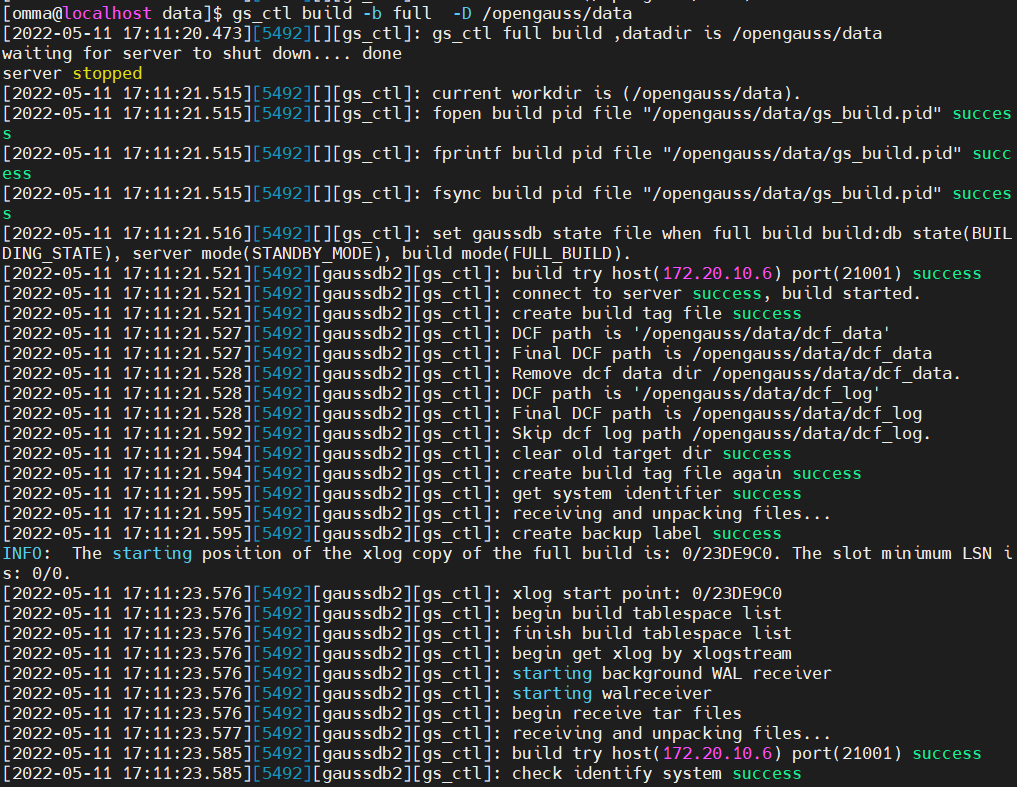 ...
...  存活节点重回多数派,在主节点执行(即 LEADER)
 gs_ctl setrunmode -D /opengauss/data -x normal
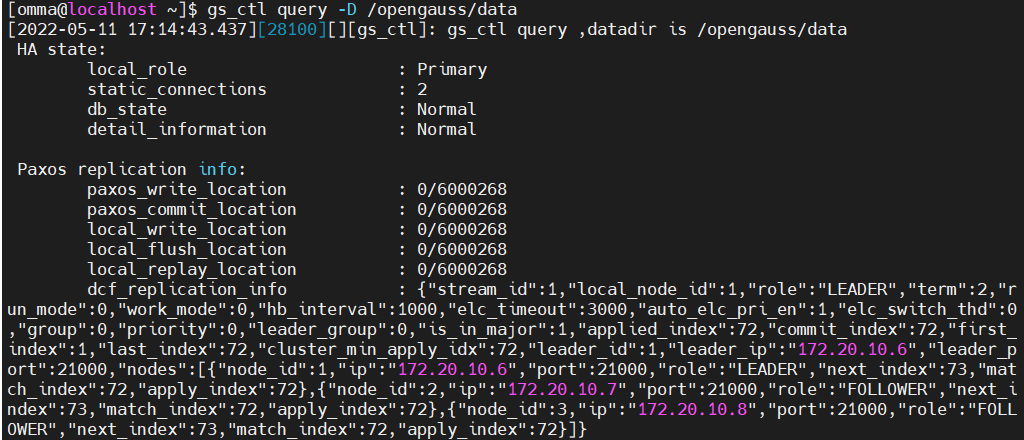
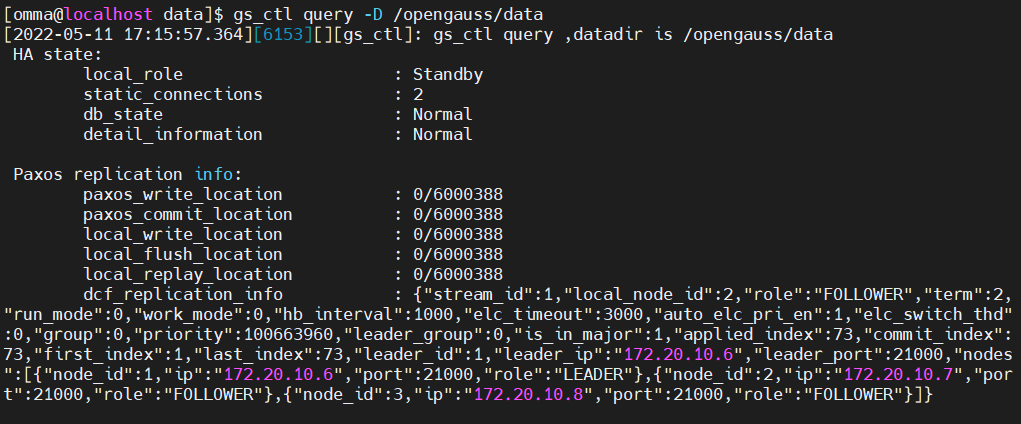
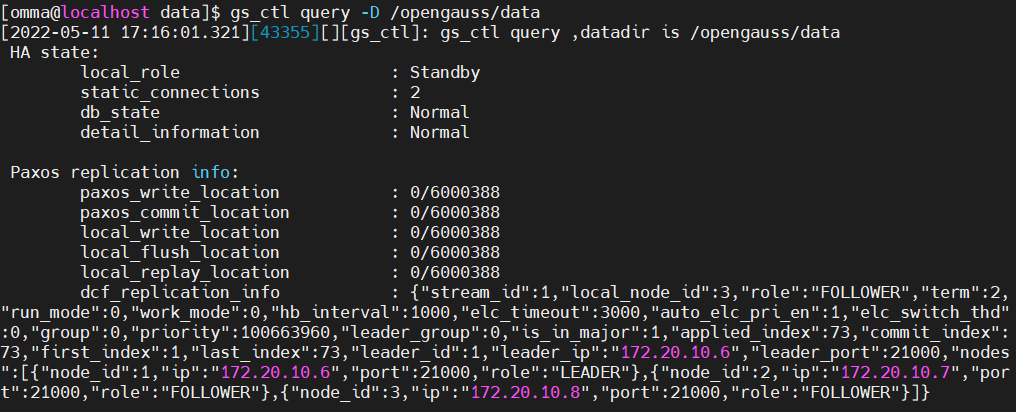
 全部节点查看状态
 gs_ctl query -D /opengauss/data
四、数据同步测试
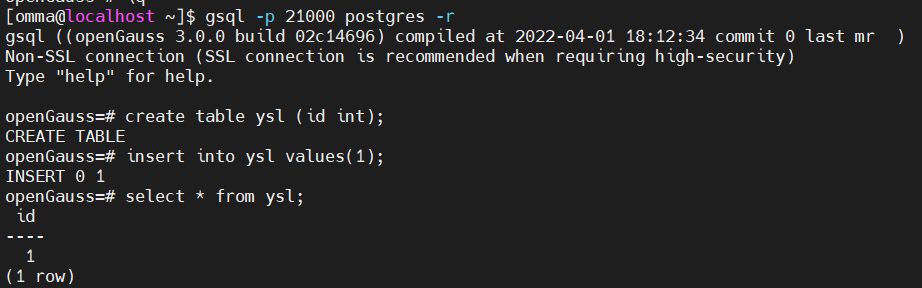
主节点
[omma@localhost ~]$ gsql -p 21000 postgres -r
gsql ((openGauss 3.0.0 build 02c14696) compiled at 2022-04-01 18:12:34 commit 0 last mr  )
Non-SSL connection (SSL connection is recommended when requiring high-security)
Type "help" for help.

openGauss=# create table ysl (id int);
CREATE TABLE
openGauss=# insert into ysl values(1);
INSERT 0 1
openGauss=# select * from ysl;
 id
----
  1
(1 row)
备机 
五、故障切换测试
主节点进行停数据库 gs_ctl stop -D /opengauss/data/ 
可以看到我们的 node2 变成了主节点,身份是 leader,而我们的原主变成了它的 follower 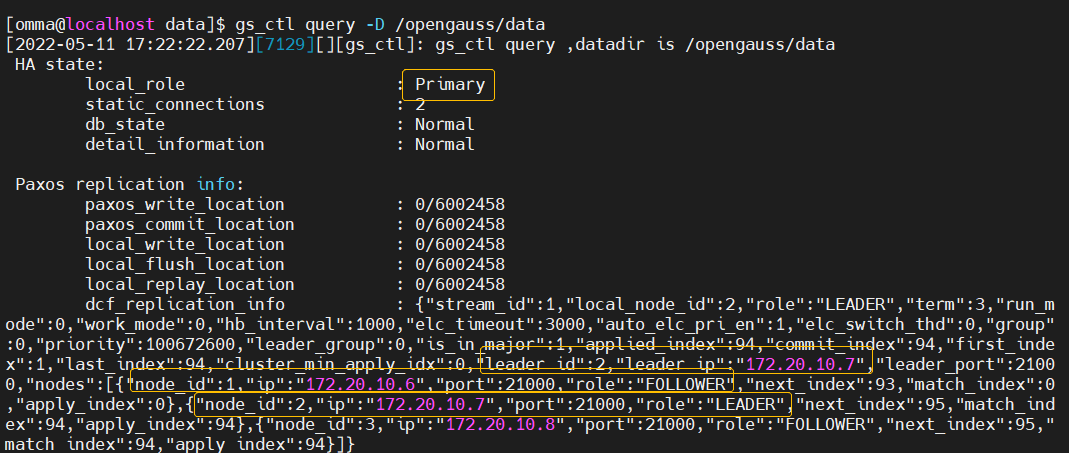
拉起原主库,以 standby 方式启动,查看当前状态,原主节点依旧是新主节点的 follower gs_ctl start -D /opengauss/data -M standby 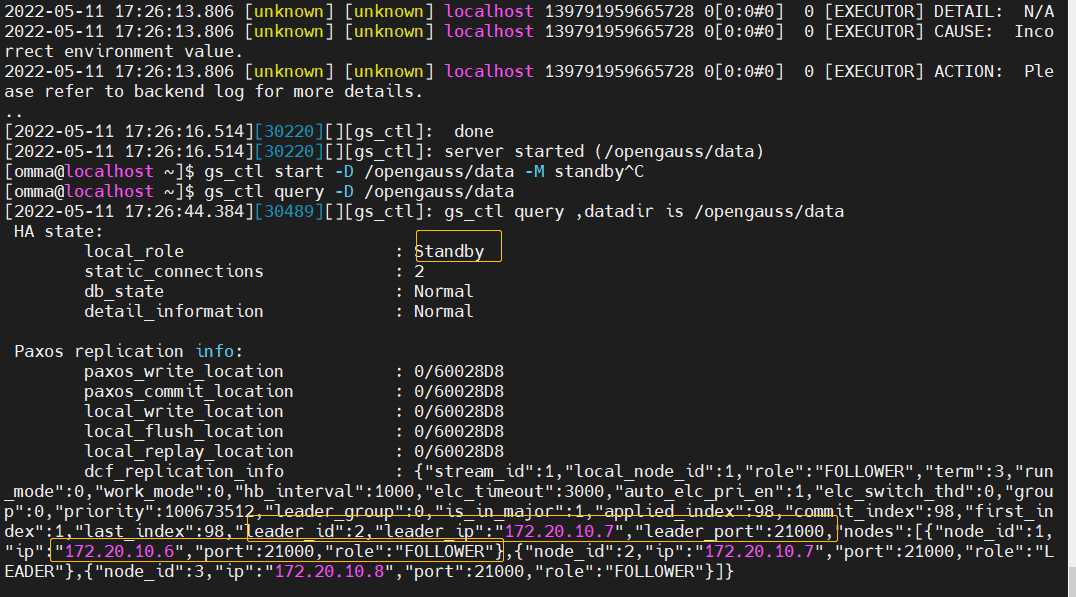
六、switchover 切换测试
在节点 1 进行 switchover 操作,之前节点 1 为 follower,执行完切换之后,可以看到我们的节点 1 又重新恢复成主节点。 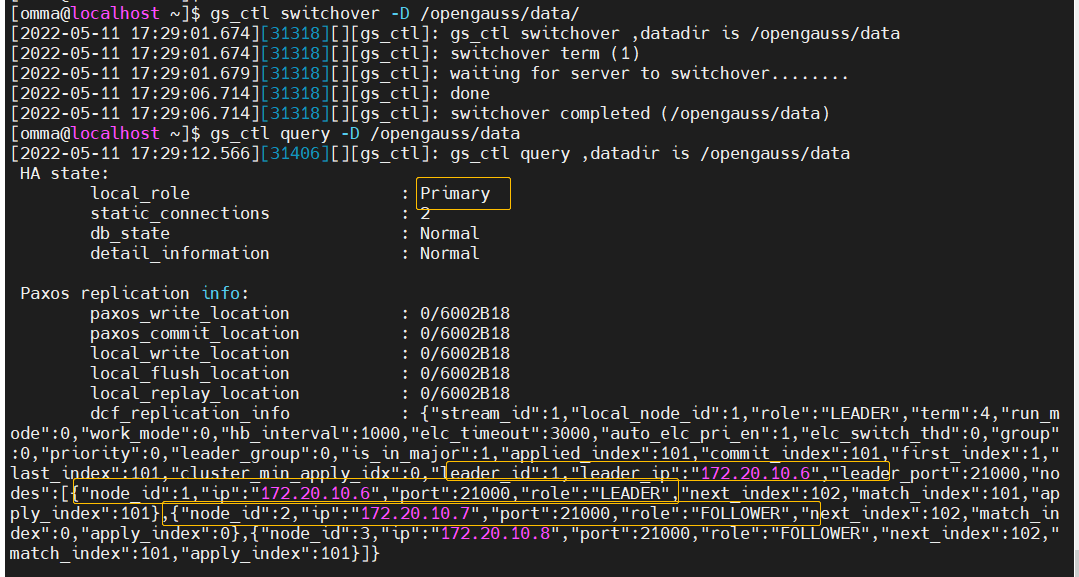
此时查看节点 2,也就是我们 switchover 之前的主节点,发现节点 2 已经 shutdown 了,需要手动再加入集群 
总结:
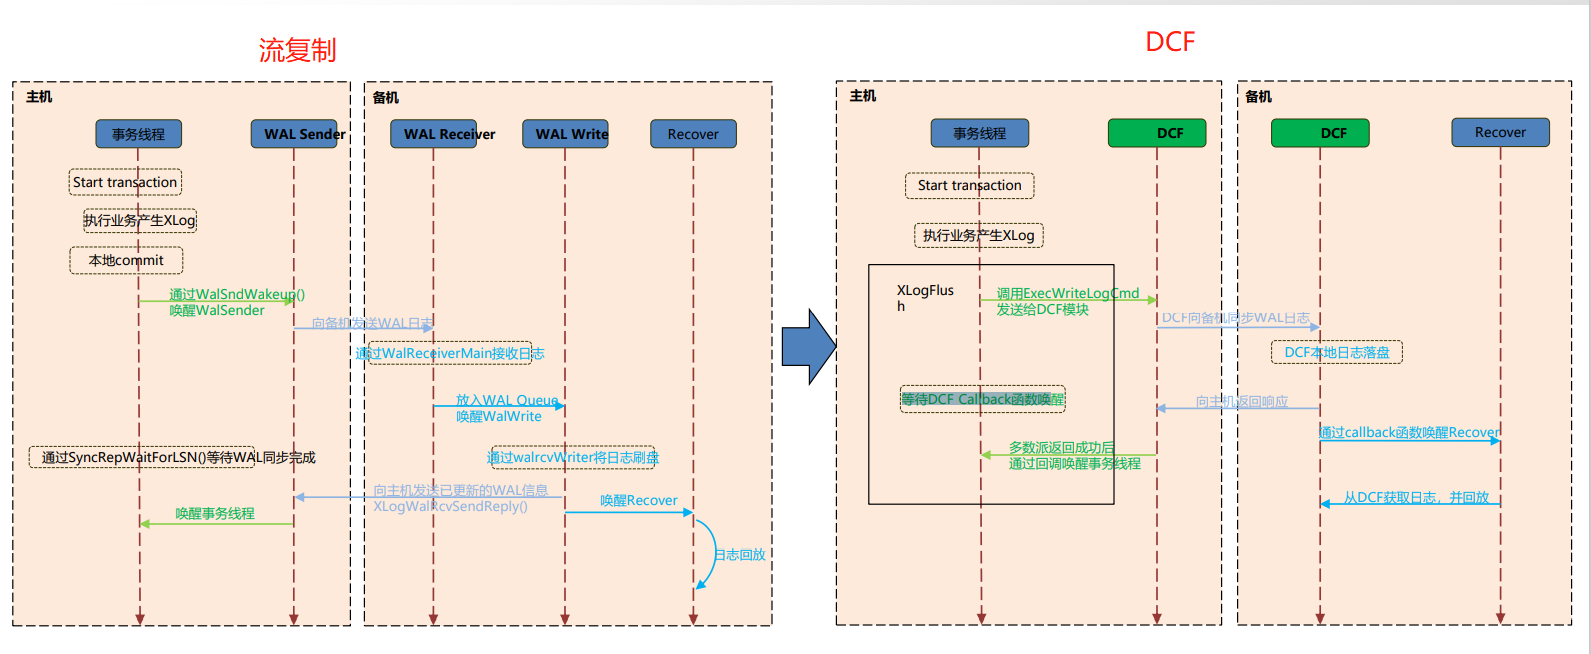
1.openGauss-3.0.0 版本的 dcf 对于 switchover,在进行切换之后会把原主节点 shutdown,而不会重启为 follower,需要手动重启。 2.此外 dcf 不像 om 工具这种部署的主备,dcf 在主节点 pg_stat_replication 视图里查询不到复制信息。  数据复制流程区别: